I needed Windows to run SimTower, so I decided to try getting Win95 to run on DOSBox. The walkthroughs online had some skippable steps and I ran into some problems, and then I got distracted optimizing it.. Anyway, here are my terse, working steps for getting very nice Win95 DOSBox images.
In addition to a Win95 CD ISO and key, you’ll need:
I’ve also packed up all of my DOSBox scripting, if you don’t want to copy and paste it from here.

Recommendations
Use Win95C (OSR 2.5)
I saw the fewest unhandled exceptions and other problems with the last Win95 release.
Trim the Win95 install CD
You can delete all of the files on the Win95C CD which aren’t on the Win95A CD to get the latest Win95 fixes, but without all of the optional software (IE, AOL, …). This also eliminated a few exceptions during the first boot. My scripting in Step 1 below copies the correct file list.
Make a Win95 install CD hard drive
I couldn’t mount the Win95 ISO so a DOS boot disk would see it. The walkthroughs copy the install directory to the target hard drive, but that means the target drive must be larger. Instead, I copied my (trimmed) Win95 setup folder to an empty hard drive image and then mount it along with the DOS Boot Disk and target drive to start setup.
Mount a second hard drive for each game
You have to boot from an “img” file in DOSBox to run Win95, but IMG files take up the whole drive size, not just the used space. I didn’t want to installing all of my games in the same Win95 image, which I could break easily, and I didn’t want a huge Win95 starting image to install each game. Instead, you can leave the Win95 image small and mount a second empty drive for each game that’s the right size to install the game to.
DOSBox.conf Template
This is the DOSBox.conf template I used for each step below. Rather than replacing the [autoexec] steps in the same file, making a separate file for each different kind of boot makes it easy to go back and forth again later.
# DOSBox configuration file for Win95 on DOSBox

[sdl]
# output=ddraw seemed to provide the lowest GPU use with the ability to scale the output
# windowresolution=1600x1200 (if double the Win95 resolution, scaling this way looks fine)
output=ddraw

[dosbox]
# 64MB is the maximum for normal DOSBox builds. The S3 Trio 64 is the most modern GPU you can emulate,
# and can run at 1600x1200 or lower resolutions in high color modes.
machine=svga_s3
memsize=63

[render]
aspect=true

[cpu]
# You need to set cputype=pentium_slow or Win95 thinks it's running on a 486 and won't install DirectX 8.
# cycles=max 80% is very fast but keeps my laptop fan from spinning wildly.
core=auto
cputype=pentium_slow
cycles=max 80%
cycleup=1000
cycledown=2000

[midi]
mpu401=intelligent
mididevice=default

[sblaster]
sbtype=sb16
sbbase=220
irq=7
dma=1
hdma=5

[autoexec]
@ECHO OFF

# Drive Geometries - DOSBOX must know the drive geometry to properly install Win95 and boot it
# <Drive Geometries> below
SET Size96MB=512,63,4,780
SET Size192MB=512,63,8,780
SET Size384MB=512,63,16,780
SET Size768MB=512,63,32,780
SET Size1536MB=512,63,64,780

SET Size64MB=512,63,4,520
SET Size128MB=512,63,8,520
SET Size256MB=512,63,16,520
SET Size512MB=512,63,32,520
SET Size1024MB=512,63,64,520
SET Size2048MB=512,63,128,520

# TODO: You must specify your Win95 and Game drive names and geometries.
SET NAME=Win95.img
SET SIZE=%Size256MB%
Step 1: Make the Win95 Install CD Hard Drive image
<DOSBOX.conf template>
...

[autoexec]
# Copy an empty 64 MB FAT-16 HDD image to 'Win95CD.img'

# Mount the image copy and a location with a Win95C (OSR 2.5) CD
imgmount c Win95CD.img -size 512,63,4,520 -t hdd
mount D ..\Sources

# Copy only Win95A setup file names for a small, patched setup.
MD C:\Win95
C:
CD Win95
COPY D:\Win95C\mini.cab .
COPY D:\Win95C\precopy*.cab .
COPY D:\Win95C\win95*.cab .
COPY D:\Win95C\extract.exe .
COPY D:\Win95C\oemsetup.exe .
COPY D:\Win95C\scandisk.exe .
COPY D:\Win95C\scanprog.exe .
COPY D:\Win95C\setup.exe .
COPY D:\Win95C\smartdrv.exe .
COPY D:\Win95C\wb15off.exe .
COPY D:\Win95C\xmsmmgr.exe .
COPY D:\Win95C\*.com .
COPY D:\Win95C\*.bin .
COPY D:\Win95C\readme.txt .

# Copy Drivers
MD C:\Drivers
COPY D:\Drivers\*.* C:\Drivers

ECHO.
ECHO Done. 'Win95CD.img' is now a trimmed Win95 CD image on a hard drive.

EXIT
Step 2: Run Win95 Setup
- Copy a 128 MB+ empty FAT-16 HDD image as ‘Win95.img’ to install the OS to.
- Get a DOS 6.22 Boot Disk to boot from to start setup.
<DOSBox.conf template>
...

[autoexec]
...
<Drive Geometries>

# TODO: Set the right img file name and size here
SET NAME=Win95.img
SET SIZE=%Size128MB%

ECHO.
ECHO 2. Boot DOS 6.22 disk and run Win95 setup from HDD
ECHO ==================================================
ECHO.

ECHO.
ECHO Inject latest INF into Win95 CD

imgmount d ..\Sources\Win95CD.img -size %Size64MB% -t hdd
mount e ..\Sources
COPY /Y E:\*.INF D:\Win95\
MOUNT -u E:
MOUNT -u D:


ECHO.
ECHO Inject setup command into boot disk

imgmount a ..\Sources\622c_Scratch.img -t floppy
ECHO D:\Win95\SETUP.EXE /im /is /IW > A:\autoexec.bat
MOUNT /u A:


ECHO.
ECHO Mount boot disk, hard drive, and Win95 install HDD

imgmount 0 ..\Sources\622c_Scratch.img -t floppy -fs none
imgmount 2  %NAME% -size %SIZE% -t hdd -fs none
imgmount 3 ..\Sources\Win95CD.img -size %Size64MB% -t hdd -fs none


ECHO.
ECHO Boot from boot disk; autoexec.bat will run Windows setup

ECHO [D:\Win95\setup.exe /im /is /IW]
boot -l a
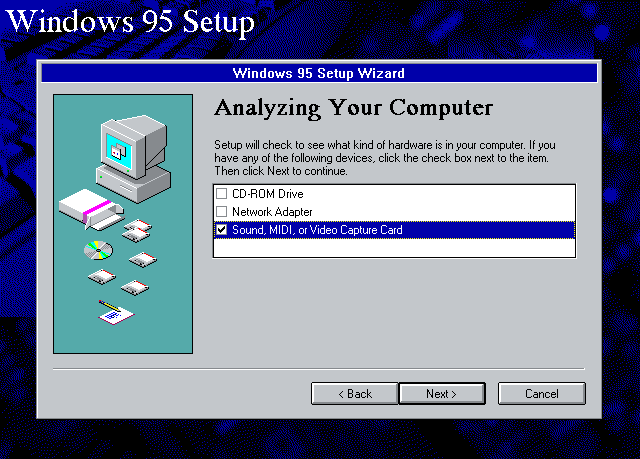
During setup, make sure to pick ‘Yes’ if asked whether to detect hardware and check ‘Sound …’ to find the sound devices. Setup is otherwise very straightforward.
3. First Win95 Boot

<DOSBox.conf template>
...

[autoexec]
...
<Drive Geometries>

# TODO: Set the right img file name and size here
SET NAME=Win95.img
SET SIZE=%Size128MB%

# Mount new hard drive
imgmount 2  %NAME% -size %SIZE% -t hdd -fs none

# Mount source drive (for driver install)
imgmount 3 ..\Sources\Win95CD.img -size %Size64MB% -t hdd -fs none

# Boot from Windows (first boot)
boot -l C
During First Boot:
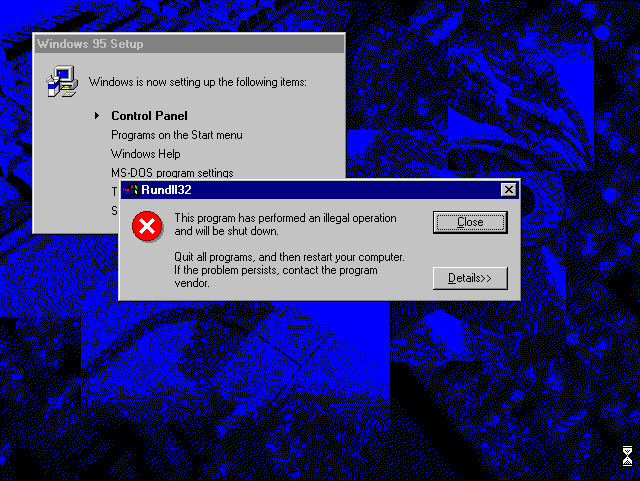
- You’ll see one unhandled exception during Control Panel setup
- Set your Time Zone
- Cancel Printer setup
- Clean up desktop icons
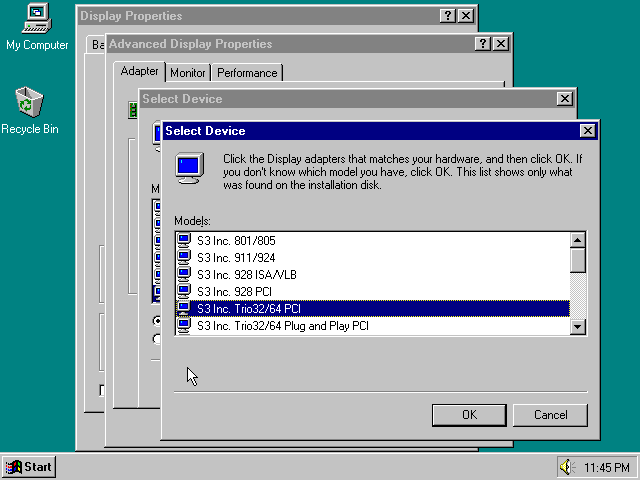
- Install Graphics Driver
- Right-click Desktop, click Properties
- In the ‘Settings’ tab, click ‘Advanced Properties’
- In ‘Adapter’, click ‘Change’
- ‘Have Disk’ -> ‘Browse’ -> D:\Drivers -> OK
- Select ‘S3 Inc. Trio32/64 PCI’ and click OK
- Shut Down
- Reboot again
- Confirm sound works
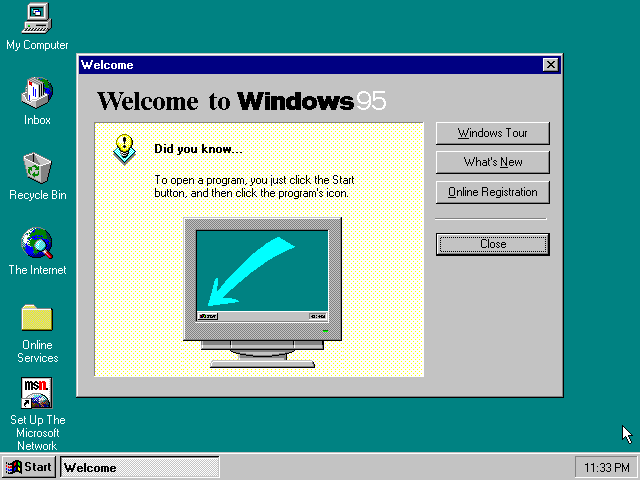
- Uncheck the checkbox for hints on startup
- Shut Down
- Make a ZIP of your (tiny!) blank Win95 image!
Step 4: Copy a Game
- Copy an empty FAT-16 HDD image for each game, with enough space to hold the setup files and the installed result.
<DOSBOX.conf template>
...

[autoexec]
...
<Drive Geometries>

# TODO: You must specify your Win95 and Game drive names and geometries.
SET NAME=Win95.img
SET SIZE=%Size256MB%
SET GAME=Game.img
SET GAMESIZE=%Size64MB%

# Mount the (scratch) Boot Disk, Hard Drive, Game Drive, and Host Folder
imgmount a ..\Sources\622C_Scratch.IMG -t floppy
imgmount c %NAME% -size %SIZE% -t hdd
imgmount d %GAME% -size %Size64MB% -t hdd
mount e .
- Install the game on D:\
Note: If the game adds to the registry or C:\Windows, you’ll have to boot the matching Win95.img for it to work later. You can save the Win95.img you installed the game with and go back to the fresh one to see if the game works.
- ZIP the Game image (and the Win95.img, if altered) to store the game compactly.
Step 4: Play a Game
<DOSBOX.conf template>
...

[autoexec]
@ECHO OFF

<Drive Geometries>

# TODO: You must specify your Win95 and Game drive names and geometries.
SET NAME=Win95.img
SET SIZE=%Size256MB%
SET GAME=Game.img
SET GAMESIZE=%Size64MB%

# Mount hard drive and game drive to boot
imgmount 2  %NAME% -size %SIZE% -t hdd -fs none
imgmount 3 %GAME% -size %GAMESIZE% -t hdd -fs none

# Boot from Windows hard drive
boot -l C
…and you’re done!

Troubleshooting
Win95 is showing a messed up screen on boot or running ScanDisk forever
This happens to me when I haven’t shut down Win95 properly. You can get your original Win95.img from your ZIP to go back to a working install.
Windows Setup Error “SU 0013”
This error blocked me in my previous walkthrough. It happens when you mount the hard drive image to write files to rather than to boot to, or you don’t specify the hard drive geometry. If you copy the Win95 setup files to the hard drive you’ll install to, you need to close DOSBox, and start again mounting the drive “boot style” before you run setup.exe.
# Mount 'copy files style'
imgmount c Win95.img -size %Size256MB% -t hdd

# Mount 'boot style'
imgmount 2 Win95.img -size %Size256MB% -t hdd -fs none
Note that to boot, you must mount to an IDE position number instead of drive letter (2 is ‘Primary Master’), you must provide the geometry (-size), and you must not let DOSBox try to read the file system (-fs none).
Opening Control Panel crashes
I saw this, but only for the first three or so boots of Win95. I know, weird. Anyway, try another reboot and it may work after that.
Bonus: Automating Win95 Setup
You really only need to install Win95 a few times (maybe once on a 256 MB, 512 MB, and 1024 MB hard drive) so you have template to use for various games. As long as you get the installs right and make backups of the images, you’re done.
However, in a past life I automated more modern Win95 setups, so I couldn’t help but look into how Win95 installs are automated.
There’s a tool on the Win95C CD in admin\nettools\bsetup called batch which will ask you for the answers to most questions setup.exe asks, and then write out a BSETUP.INF file you can use to automate. Pass this as an argument to setup.exe, and you’ve got an automated install:
D:\Win95\setup.exe /im /is /IW D:\Win95\BSETUP.INF
Here is the one I ended up with. I figured out everything except how to get it to look for a sound card, so I wasn’t able to leave it fully automated (and, it got stuck on the exception setting up the Control Panel also). [If anyone reading this knows how to do that, I’d love to know!]
Some settings in the INF and what they do (found by changing UI in the batch tool and re-exporting):
| Key Under [SETUP] | Purpose |
|---|---|
| Express=1 | Unattended [0 = Stop at every screen] |
| InstallDir=“C:\WINDOWS” | Install Directory |
| EBD=0 | Prompt to create (emergency) boot disk |
| ChangeDir=0 | ? |
| OptionalComponents=1 | Install any Optional Components |
| Network=1 | Configure Networking per below section |
| System=0 | ? |
| CCP=0 | ? |
| CleanBoot=0 | ? |
| Display=0 | ? |
| PenWinWarning=0 | “Enable PenWindows warning” [?] |
| InstallType=3 | Whether install is Disk or CD, upgrade or clean |
| DevicePath=0 | “Search source folder for devices” |
| TimeZone=“Pacific” | Time Zone to set on first boot |
| Uninstall=0 | Whether to save uninstall information |
| VRC=0 | “Auto-answer ‘No to all’ to version conflict dialogs” |
| NoPrompt2Boot=1 | “Automatically reboot PCI and PnP machines during setup” |
| ProductKey=XXX | Product Key to pre-fill in UX |
| ProductType=1 | OEM version indicator; only needed in separate MSBATCH.INF |
| [Printers]\r\n | (Separate from [SETUP]) Don’t prompt to install a printer |